![]()
Download Article
![]()
Download Article
Some people have the false notion that comic books are for kids, when in fact comics and graphic novels are intricate forms of expression and storytelling that can be read and appreciated by audiences of any age. There are two main types of scripts: plot first (also known as «Marvel style») comic scripts, and full script comics. Writing a script for a comic book is a lot of work, no matter which type of script you choose. Whether you’re a writer and an artist, a writer wanting to collaborate with an artist, or a writer who just has an interesting visual story to tell, learning how to write and format a comic book script can help you get your story off the ground.
-

1
Decide if a plot first script is right for you. Plot first scripts, often called «Marvel style» scripts due to Stan Lee’s preferred style, leaves out a lot of the detailed instruction and gives that creative license to the artist or illustrator. There are exceptions, of course, but typically a plot first script is chosen when the writer and the artist have a strong rapport from previous projects, or when the writer will also do his own illustrations, in which case the script serves more as an outline for what the artist/writer anticipates will happen.
- A plot first script will typically include the characters, narrative arc, and page instructions. This type of script generally leaves the details of the script, such as the number of panels, the arrangement of panels, and the pacing within the page, to the illustrator’s discretion. Often times the particulars of a scene, such as dialogue and captions, are added by the writer after the illustrator has created the art and broken the various scenes down into their panels.
- Unless you intend to write and illustrate your comic, a plot first script works best when the writer and illustrator have worked together in the past and trust one another’s vision for the comic.
-
2
Devise a plot line. A plot first script doesn’t have to be as detailed as a full script, as the script serves as more of a template or outline of the comic’s narrative arc. But there are still important decisions to be made, and a writer working on a plot first script must think in terms of storylines for the current issue as well as future issues of the comic.
- A plot first script typically focuses on the characters and story arc involved in a given comic’s issue.
- The script will focus on which characters are involved in that issue, what will happen to each character, and may include some notes about how the characters will interact with one another in that issue.
- Once the script is written, the artist illustrates the panels. Because the plot first script is so minimal, the writer often ends up giving the artist extensive liberty to determine how events unfold, and at what pace.
Advertisement
-
3
Write dialogue to fit the panels. Once the artist has illustrated the panels, the writer reviews the panels and writes dialogue to fit the sequence of events that the artist has depicted. The writer’s dialogue is limited by the space provided for caption bubbles and by the imagery that the artist has chosen. For this reason, it is worth reiterating that plot first scripts work best when the writer and the artist have worked together in the past and have a shared vision for the style, format, and story arc of the comic.


Advertisement
-
1
Choose a script format. Unlike screenplays, there is no single standard format for full script comics. You may choose to follow a screenplay format, or you may wish to mimic the script format of a comic series that you really enjoy. Or you as the writer may choose to create your own format that makes the most sense to you. However you choose to format your script, be sure that it includes the following:
- unambiguous directions that the artist will be able to follow
- visible page and panel numbers
- indentations or other visual cues in the script for dialogue, captions, and sound effects
-
2
Decide on a page layout. Once you’ve decided how you want the script to be formatted, you may want to take a bit of time to determine how you want the comics to visually appear on the page. Just as there is no single standard format for a script’s format, there is no single page layout that a comic must follow.
- Some comics progress from left to right like written sentences. Other comics use larger, page-wide panels that progress from top to bottom. Still others use entire pages as a single panel.
- Some comics will use one page layout — say, a series of panels read from left to right, top to bottom — and then throw in some variance for dramatic effect. A common tactic is to suddenly shift to a panel that takes up an entire page, for dramatic effect. This might happen during a dramatic death, an unexpected betrayal, or anything else that will shock or surprise your readers.
-
3
Write an outline. Once you begin writing the script you’ll significantly expand the ideas and develop your characters more thoroughly, but when you’re starting your script it may be helpful to have an outline. This allows you to have a reference of your original intentions, in case you get too deep into expanding and developing. It also gives you a bare bones template that can help you plan out how a given issue’s plot and story arc will relate to other issues of your comic.
- Start by writing a single sentence for each turn of events in the story.[1]
- Add in some brief notes on which characters are involved in each major event, and how those characters relate to one another.[2]
- If you have ideas planned out for future issues of your comic, connect your notes for the current issue with other single sentence plot points for the future.[3]
- Start by writing a single sentence for each turn of events in the story.[1]
-
4
Think visually. Once you’ve plotted out your story’s outline, you’ll need to start planning for the script itself. Before you begin writing the script, think visually about the outline you’ve created. Don’t just restrict yourself to the main sequence of events. You may choose to give a lot of creative license to your illustrator, or you may decide to give visual direction to the illustrator on how to depict the setting of your comic (including whether that setting’s ambiance changes from day to night or from season to season). You’ll also need to come up with concrete visual images for things like establishing shots, character closeups (including the style of dress and any traits or quirks of characters), and the general feeling you want readers to have about each character and the environment they inhabit.[4]
- The best way to train yourself to think visually as a comic writer is to read a wide variety of comic books and graphic novels. Look closely at the style of each comic and the details given in each panel. Think about what kinds of written direction you would need to give an illustrator for him to design that scene/panel/character.[5]
- The best way to train yourself to think visually as a comic writer is to read a wide variety of comic books and graphic novels. Look closely at the style of each comic and the details given in each panel. Think about what kinds of written direction you would need to give an illustrator for him to design that scene/panel/character.[5]


Advertisement
-
1
Write description lines. The description lines will instruct the illustrator on how various parts of the comic should appear. This can be tricky, as it requires you to combine the visual imagery you’ve envisioned with detailed written instructions to the illustrator. Common directions given in description lines include instructions for the establishing shots in a given comic, closeups of characters or images, and background imagery. There are two common methods of writing description lines:
- Page description provides the illustrator with the setting, mood, characters, and action sequences that are to appear on each page of the comic. The illustrator then decides how many panels will appear on each page, and chooses how best to represent those instructions in each panel.
- Panel description gives detailed instructions to the illustrator on how each panel should appear, and what should happen in each panel. Some writers even recommend to the illustrator how to frame each «shot» of each panel.
-
2
Highlight significant visual elements. The writer should mention specific details about any visual elements that are important to the plot. This may include meaningful objects, characters who will be relevant later in the story, and even what season or time of day a given panel takes place in.
- Give any relevant information that the artist will need before drawing out each scene, such as time of day, expressions on characters’ faces, and any objects or environmental details that will be significant later in the comic.
-
3
Write captions. Captions can be thought of as the voice of the disembodied narrator who informs readers of where the action is taking place, or providing «voice overs» during meaningful events in the comic. They appear in square or rectangular boxes, usually at the top or bottom of a comic panel. Captions should work in conjunction with the images drawn by the artist to help inform the reader or to elevate the reader’s experience of the comic’s narrative arc.
- Write captions in the order they should appear in the finished comic.
- Avoid captions that simply repeat or reiterate the visual cues from the comic. In other words, don’t use captions to tell the reader what would otherwise have been inferred from looking at the comic.
-
4
Write dialogue. Dialogue is the actual conversations and soliloquies that characters speak during the course of the comic. Dialogue boxes are often depicted as a round or oval-shaped bubble, usually with a small «tail» to a character’s mouth to indicate that that character is speaking.
- Characters should appear in a panel in speaking order. In other words, the character on the left should talk first, with her dialogue bubble appearing above any subsequent dialogue bubbles. If two characters have a back-and-forth conversation, the character on the left should speak first, and the character on the right should respond with a dialogue bubble below the first speaker’s text.
- One lengthy dialogue bubble or conversation between two or more characters should be contained in a single, still frame.
- Don’t try to cram too much dialogue into one panel. Rather than cramming a panel so full of conversation that it blocks out the characters, you may want to opt for a back-and-forth conversation where one panel shows a closeup of one speaker (and her dialogue), and the next panel shows a closeup of the other speaker (and his dialogue).
- Once you’ve written your dialogue, read it out loud. Like any written dialogue, it may sound different when heard out loud, and you may notice some lines are difficult to read quickly or sound weird when paired with the action in that scene. Always read your dialogue out loud, and ask yourself if the dialogue (when heard out loud) conveys what it should be conveying in the scene.[6]
- Don’t get bogged down in verbal writing. The primary characteristic of a comic is the visual element, so remember the old adage, «less is more.»[7]
-
5
Write the action. This part of the script may be most similar to a film script in that it gives extensive detail about what will actually happen during the course of a comic. Some successful comic writers recommend writing for yourself first, and the audience second. In other words, don’t compromise your vision for what your comic should look like because of what you imagine people do or don’t want to see. Write a comic that you’ll be satisfied with, and if it’s a sincere and meaningful comic to you, it will most likely be meaningful to your audience.[8]
- Each panel should develop a character or further the narrative story being told. In other words, don’t be wasteful with your panels, and make the action count for something in your story.
- Remember that the primary action of your comic will be visual. As you write the action for the script, don’t get too text-heavy. Just provide the illustrator with sufficiently detailed instructions on how the action should look.
-
6
Write transitions for your comic. Once you’ve written the action, dialogue, and captions, you’ll need to write how the illustrator should transition the comic from one panel to the next. This is important, as poor transitions can make the comic feel choppy, inconsistent, or even confusing. Regardless of the comic’s pace, each panel should flow together smoothly and seamlessly. Some common types of transitions include:
- Moment to moment transitions — the same person, object, or scene is shown in succession across multiple panels, with each panel showing a different (but not too distant) moment.This may be useful for showing transitions in mood as one character relays information to another character, for example.
- Action to action transitions — the same person, object, or scene is shown in succession across multiple panels depicting different — yet still related — actions. This may be useful as a sort of visual montage to show the passage of time as a character trains for a fight or embarks on a journey, for example.
- Subject to subject transitions — each panel depicts a different person or object, across a continuous scene. This is useful for breaking a longer conversation into smaller dialogue panels.
- Scene to scene transitions — the two panels in this type of transition show entirely different scenes, which may take place in differing environments or time periods and may depict different characters or actions.
- Aspect to aspect transitions — each panel in this type of transition shows different aspects or elements of the same place, people, or action.
- Non sequitur transitions — this type of transition makes a drastic jump from one scene to the next without any apparent continuity or connection from one panel to the next. Because of the potential for confusing readers, this type of transition is very rare in most comics that follow a continuous narrative arc.


Advertisement
-
1
Choose your comic’s duration. Do you see your comic being a stand-alone story, or part of a larger narrative? Does your comic’s narrative follow a single person, a group of people, or multiple generations of people? All of these are important factors to determine before you try to get your comic published. If you go through a publisher, they will most likely want to know before publication what you see for the future of your comic. Knowing the «mythology» of your comic’s universe will help you find a publisher who will make your dreams for your comic come to life.
-
2
Explore your publishing options. There are many different publication routes a comic writer can take. Which route you choose will depend on your vision for your comic, what kind of audience you realistically see the comic appealing to (niche audience or mass appeal), and whether you’d prefer to work with a smaller «indie» press or a larger publishing agency. Each option has its advantages and disadvantages, and no single choice is necessarily «better» than any other.
- Search for different comic publishers online and read about each publishing press’s submission guidelines, contractual obligations, and monetary compensation. You should also look into whether or not a given publishing press accepts unsolicited manuscripts.
-
3
Compile a proposal package. Once you’ve done your research and you know what kind of press you’d like to work with, you’ll want to put together a proposal package to send to a given publishing press. Include your name and contact information on every page of the package, in case any pages are lost or separated from the package. A good proposal package will include:
- a cover letter that addresses the editor of a press by name and includes all of your contact information, as well as what your comic is generally about
- a written «elevator pitch» that summarizes the plot of your comic
- a detailed plot outline and elaborate character biographies
- a rough estimate of your comic’s length, format, and any ideas for future story arcs
- an introduction to your comic’s setting (which is particularly important to know in the case of science fiction or alternate reality comics)
- a full script or, at minimum, a sufficient sample of your script to give the editor a good idea of how your comic will appear and what type of story it will be
- any illustrations you or an outside artist have come up with for your characters, setting, or action sequences
- any relevant copyright/trademark notices


Advertisement
Add New Question
-
Question
Can a student of 15 write, draw and publish comic books?

You would need a parent or guardian’s signature for any legal forms, agreements, or documents, but you otherwise face no greater barriers than anyone attempting to do the same.
-
Question
Can a 14 year younger teen publish a comic with no help from a publisher? If possible, which channels or methods can I use?
If you don’t want to go through a publisher, you can publish on Amazon on their self publishing site. You can find them by googling «publishing for minors.» Alternatively, you can go through an alternative publisher that specializes in comic books for 14 and younger––one possibility is papercutz.com.
-
Question
How can I imagine a story for a comic book?
Start by imagining the type of story you would like to read. Are you interested in science fiction, fantasy, or mystery? Also, don’t hesitate to talk with family and friends for ideas.

See more answers
Ask a Question
200 characters left
Include your email address to get a message when this question is answered.
Submit
Advertisement
Thanks for submitting a tip for review!
References
About This Article
Article SummaryX
To write a script for a comic book, start by creating an outline to capture your story’s major events. Then, use it to develop either page description lines or panel description lines, which provide guidance to the illustrator about how various parts of the comic should appear. Next, craft captions that provide story information beyond what you want the illustrations to convey. After that, write dialogue for your characters and give the illustrator directions on how to transition from one panel to the next. For tips on how to choose a script format and page layout for your comic book, read on!
Did this summary help you?
Thanks to all authors for creating a page that has been read 65,386 times.
Did this article help you?
![]()
Download Article
![]()
Download Article
Some people have the false notion that comic books are for kids, when in fact comics and graphic novels are intricate forms of expression and storytelling that can be read and appreciated by audiences of any age. There are two main types of scripts: plot first (also known as «Marvel style») comic scripts, and full script comics. Writing a script for a comic book is a lot of work, no matter which type of script you choose. Whether you’re a writer and an artist, a writer wanting to collaborate with an artist, or a writer who just has an interesting visual story to tell, learning how to write and format a comic book script can help you get your story off the ground.
-
1
Decide if a plot first script is right for you. Plot first scripts, often called «Marvel style» scripts due to Stan Lee’s preferred style, leaves out a lot of the detailed instruction and gives that creative license to the artist or illustrator. There are exceptions, of course, but typically a plot first script is chosen when the writer and the artist have a strong rapport from previous projects, or when the writer will also do his own illustrations, in which case the script serves more as an outline for what the artist/writer anticipates will happen.
- A plot first script will typically include the characters, narrative arc, and page instructions. This type of script generally leaves the details of the script, such as the number of panels, the arrangement of panels, and the pacing within the page, to the illustrator’s discretion. Often times the particulars of a scene, such as dialogue and captions, are added by the writer after the illustrator has created the art and broken the various scenes down into their panels.
- Unless you intend to write and illustrate your comic, a plot first script works best when the writer and illustrator have worked together in the past and trust one another’s vision for the comic.
-
2
Devise a plot line. A plot first script doesn’t have to be as detailed as a full script, as the script serves as more of a template or outline of the comic’s narrative arc. But there are still important decisions to be made, and a writer working on a plot first script must think in terms of storylines for the current issue as well as future issues of the comic.
- A plot first script typically focuses on the characters and story arc involved in a given comic’s issue.
- The script will focus on which characters are involved in that issue, what will happen to each character, and may include some notes about how the characters will interact with one another in that issue.
- Once the script is written, the artist illustrates the panels. Because the plot first script is so minimal, the writer often ends up giving the artist extensive liberty to determine how events unfold, and at what pace.
Advertisement
-
3
Write dialogue to fit the panels. Once the artist has illustrated the panels, the writer reviews the panels and writes dialogue to fit the sequence of events that the artist has depicted. The writer’s dialogue is limited by the space provided for caption bubbles and by the imagery that the artist has chosen. For this reason, it is worth reiterating that plot first scripts work best when the writer and the artist have worked together in the past and have a shared vision for the style, format, and story arc of the comic.
Advertisement
-
1
Choose a script format. Unlike screenplays, there is no single standard format for full script comics. You may choose to follow a screenplay format, or you may wish to mimic the script format of a comic series that you really enjoy. Or you as the writer may choose to create your own format that makes the most sense to you. However you choose to format your script, be sure that it includes the following:
- unambiguous directions that the artist will be able to follow
- visible page and panel numbers
- indentations or other visual cues in the script for dialogue, captions, and sound effects
-
2
Decide on a page layout. Once you’ve decided how you want the script to be formatted, you may want to take a bit of time to determine how you want the comics to visually appear on the page. Just as there is no single standard format for a script’s format, there is no single page layout that a comic must follow.
- Some comics progress from left to right like written sentences. Other comics use larger, page-wide panels that progress from top to bottom. Still others use entire pages as a single panel.
- Some comics will use one page layout — say, a series of panels read from left to right, top to bottom — and then throw in some variance for dramatic effect. A common tactic is to suddenly shift to a panel that takes up an entire page, for dramatic effect. This might happen during a dramatic death, an unexpected betrayal, or anything else that will shock or surprise your readers.
-
3
Write an outline. Once you begin writing the script you’ll significantly expand the ideas and develop your characters more thoroughly, but when you’re starting your script it may be helpful to have an outline. This allows you to have a reference of your original intentions, in case you get too deep into expanding and developing. It also gives you a bare bones template that can help you plan out how a given issue’s plot and story arc will relate to other issues of your comic.
- Start by writing a single sentence for each turn of events in the story.[1]
- Add in some brief notes on which characters are involved in each major event, and how those characters relate to one another.[2]
- If you have ideas planned out for future issues of your comic, connect your notes for the current issue with other single sentence plot points for the future.[3]
- Start by writing a single sentence for each turn of events in the story.[1]
-
4
Think visually. Once you’ve plotted out your story’s outline, you’ll need to start planning for the script itself. Before you begin writing the script, think visually about the outline you’ve created. Don’t just restrict yourself to the main sequence of events. You may choose to give a lot of creative license to your illustrator, or you may decide to give visual direction to the illustrator on how to depict the setting of your comic (including whether that setting’s ambiance changes from day to night or from season to season). You’ll also need to come up with concrete visual images for things like establishing shots, character closeups (including the style of dress and any traits or quirks of characters), and the general feeling you want readers to have about each character and the environment they inhabit.[4]
- The best way to train yourself to think visually as a comic writer is to read a wide variety of comic books and graphic novels. Look closely at the style of each comic and the details given in each panel. Think about what kinds of written direction you would need to give an illustrator for him to design that scene/panel/character.[5]
- The best way to train yourself to think visually as a comic writer is to read a wide variety of comic books and graphic novels. Look closely at the style of each comic and the details given in each panel. Think about what kinds of written direction you would need to give an illustrator for him to design that scene/panel/character.[5]
Advertisement
-
1
Write description lines. The description lines will instruct the illustrator on how various parts of the comic should appear. This can be tricky, as it requires you to combine the visual imagery you’ve envisioned with detailed written instructions to the illustrator. Common directions given in description lines include instructions for the establishing shots in a given comic, closeups of characters or images, and background imagery. There are two common methods of writing description lines:
- Page description provides the illustrator with the setting, mood, characters, and action sequences that are to appear on each page of the comic. The illustrator then decides how many panels will appear on each page, and chooses how best to represent those instructions in each panel.
- Panel description gives detailed instructions to the illustrator on how each panel should appear, and what should happen in each panel. Some writers even recommend to the illustrator how to frame each «shot» of each panel.
-
2
Highlight significant visual elements. The writer should mention specific details about any visual elements that are important to the plot. This may include meaningful objects, characters who will be relevant later in the story, and even what season or time of day a given panel takes place in.
- Give any relevant information that the artist will need before drawing out each scene, such as time of day, expressions on characters’ faces, and any objects or environmental details that will be significant later in the comic.
-
3
Write captions. Captions can be thought of as the voice of the disembodied narrator who informs readers of where the action is taking place, or providing «voice overs» during meaningful events in the comic. They appear in square or rectangular boxes, usually at the top or bottom of a comic panel. Captions should work in conjunction with the images drawn by the artist to help inform the reader or to elevate the reader’s experience of the comic’s narrative arc.
- Write captions in the order they should appear in the finished comic.
- Avoid captions that simply repeat or reiterate the visual cues from the comic. In other words, don’t use captions to tell the reader what would otherwise have been inferred from looking at the comic.
-
4
Write dialogue. Dialogue is the actual conversations and soliloquies that characters speak during the course of the comic. Dialogue boxes are often depicted as a round or oval-shaped bubble, usually with a small «tail» to a character’s mouth to indicate that that character is speaking.
- Characters should appear in a panel in speaking order. In other words, the character on the left should talk first, with her dialogue bubble appearing above any subsequent dialogue bubbles. If two characters have a back-and-forth conversation, the character on the left should speak first, and the character on the right should respond with a dialogue bubble below the first speaker’s text.
- One lengthy dialogue bubble or conversation between two or more characters should be contained in a single, still frame.
- Don’t try to cram too much dialogue into one panel. Rather than cramming a panel so full of conversation that it blocks out the characters, you may want to opt for a back-and-forth conversation where one panel shows a closeup of one speaker (and her dialogue), and the next panel shows a closeup of the other speaker (and his dialogue).
- Once you’ve written your dialogue, read it out loud. Like any written dialogue, it may sound different when heard out loud, and you may notice some lines are difficult to read quickly or sound weird when paired with the action in that scene. Always read your dialogue out loud, and ask yourself if the dialogue (when heard out loud) conveys what it should be conveying in the scene.[6]
- Don’t get bogged down in verbal writing. The primary characteristic of a comic is the visual element, so remember the old adage, «less is more.»[7]
-
5
Write the action. This part of the script may be most similar to a film script in that it gives extensive detail about what will actually happen during the course of a comic. Some successful comic writers recommend writing for yourself first, and the audience second. In other words, don’t compromise your vision for what your comic should look like because of what you imagine people do or don’t want to see. Write a comic that you’ll be satisfied with, and if it’s a sincere and meaningful comic to you, it will most likely be meaningful to your audience.[8]
- Each panel should develop a character or further the narrative story being told. In other words, don’t be wasteful with your panels, and make the action count for something in your story.
- Remember that the primary action of your comic will be visual. As you write the action for the script, don’t get too text-heavy. Just provide the illustrator with sufficiently detailed instructions on how the action should look.
-
6
Write transitions for your comic. Once you’ve written the action, dialogue, and captions, you’ll need to write how the illustrator should transition the comic from one panel to the next. This is important, as poor transitions can make the comic feel choppy, inconsistent, or even confusing. Regardless of the comic’s pace, each panel should flow together smoothly and seamlessly. Some common types of transitions include:
- Moment to moment transitions — the same person, object, or scene is shown in succession across multiple panels, with each panel showing a different (but not too distant) moment.This may be useful for showing transitions in mood as one character relays information to another character, for example.
- Action to action transitions — the same person, object, or scene is shown in succession across multiple panels depicting different — yet still related — actions. This may be useful as a sort of visual montage to show the passage of time as a character trains for a fight or embarks on a journey, for example.
- Subject to subject transitions — each panel depicts a different person or object, across a continuous scene. This is useful for breaking a longer conversation into smaller dialogue panels.
- Scene to scene transitions — the two panels in this type of transition show entirely different scenes, which may take place in differing environments or time periods and may depict different characters or actions.
- Aspect to aspect transitions — each panel in this type of transition shows different aspects or elements of the same place, people, or action.
- Non sequitur transitions — this type of transition makes a drastic jump from one scene to the next without any apparent continuity or connection from one panel to the next. Because of the potential for confusing readers, this type of transition is very rare in most comics that follow a continuous narrative arc.
Advertisement
-
1
Choose your comic’s duration. Do you see your comic being a stand-alone story, or part of a larger narrative? Does your comic’s narrative follow a single person, a group of people, or multiple generations of people? All of these are important factors to determine before you try to get your comic published. If you go through a publisher, they will most likely want to know before publication what you see for the future of your comic. Knowing the «mythology» of your comic’s universe will help you find a publisher who will make your dreams for your comic come to life.
-
2
Explore your publishing options. There are many different publication routes a comic writer can take. Which route you choose will depend on your vision for your comic, what kind of audience you realistically see the comic appealing to (niche audience or mass appeal), and whether you’d prefer to work with a smaller «indie» press or a larger publishing agency. Each option has its advantages and disadvantages, and no single choice is necessarily «better» than any other.
- Search for different comic publishers online and read about each publishing press’s submission guidelines, contractual obligations, and monetary compensation. You should also look into whether or not a given publishing press accepts unsolicited manuscripts.
-
3
Compile a proposal package. Once you’ve done your research and you know what kind of press you’d like to work with, you’ll want to put together a proposal package to send to a given publishing press. Include your name and contact information on every page of the package, in case any pages are lost or separated from the package. A good proposal package will include:
- a cover letter that addresses the editor of a press by name and includes all of your contact information, as well as what your comic is generally about
- a written «elevator pitch» that summarizes the plot of your comic
- a detailed plot outline and elaborate character biographies
- a rough estimate of your comic’s length, format, and any ideas for future story arcs
- an introduction to your comic’s setting (which is particularly important to know in the case of science fiction or alternate reality comics)
- a full script or, at minimum, a sufficient sample of your script to give the editor a good idea of how your comic will appear and what type of story it will be
- any illustrations you or an outside artist have come up with for your characters, setting, or action sequences
- any relevant copyright/trademark notices
Advertisement
Add New Question
-
Question
Can a student of 15 write, draw and publish comic books?
You would need a parent or guardian’s signature for any legal forms, agreements, or documents, but you otherwise face no greater barriers than anyone attempting to do the same.
-
Question
Can a 14 year younger teen publish a comic with no help from a publisher? If possible, which channels or methods can I use?
If you don’t want to go through a publisher, you can publish on Amazon on their self publishing site. You can find them by googling «publishing for minors.» Alternatively, you can go through an alternative publisher that specializes in comic books for 14 and younger––one possibility is papercutz.com.
-
Question
How can I imagine a story for a comic book?
Start by imagining the type of story you would like to read. Are you interested in science fiction, fantasy, or mystery? Also, don’t hesitate to talk with family and friends for ideas.
See more answers
Ask a Question
200 characters left
Include your email address to get a message when this question is answered.
Submit
Advertisement
Thanks for submitting a tip for review!
References
About This Article
Article SummaryX
To write a script for a comic book, start by creating an outline to capture your story’s major events. Then, use it to develop either page description lines or panel description lines, which provide guidance to the illustrator about how various parts of the comic should appear. Next, craft captions that provide story information beyond what you want the illustrations to convey. After that, write dialogue for your characters and give the illustrator directions on how to transition from one panel to the next. For tips on how to choose a script format and page layout for your comic book, read on!
Did this summary help you?
Thanks to all authors for creating a page that has been read 65,386 times.
Did this article help you?
Описание презентации Сценарий комикса Методы и идеи Стандартный комикс по слайдам
 Сценарий комикса Методы и идеи
 Стандартный комикс может получиться спонтанно или основываться на небольшой истории. Однако, если Ваша цель большой долговременный проект то Вам необходим сценарий в котором подробно расписаны все приключения Вашего персонажа.
 Метод широко используемый писателями и сценаристами. «Метод снежинки» Рэнди Ингермансона. Что это такое?
 «Метод снежинки» Рэнди Ингермансона.
 МЕТОД: • Здесь мы видим пошаговую стратегию создания снежинки. Поначалу она не очень похожа на саму себя, но постепенно все становится на свои места. • На тех же самых принципах можно писать сценарий — начните с малого, а потом надстраивайте все новые и новые детали, пока у вас не получится полноценная история. Часть дизайнерской работы— это креатив, а часть — это управление собственным креативом: превращение разрозненного материала в хорошо структурированный труд.
 Большинство затрачивает массу времени на обдумывание
 ЭТАПЫ: • вы проводите какие-то исследования. • Вы просчитываете, как будет развиваться история. • Вы устраиваете мозговой штурм. • Вы слышите голоса различных персонажей. Это наиважнейшая часть создания книги « накидывание информации »
 Недочеты: Но прежде, чем приступить к делу, вам следует заняться организационными моментами. Вам нужно записать все идеи на бумаге в той форме, которую вы потом сможете использовать. Зачем? Потому что наша память ненадежна , и потому что в вашей истории (как и в любой другой, находящейся на той же стадии) имеется множество дыр, которые необходимо залатать до того, как вы начнете работать. Вам нужно создать план романа , причем так, чтобы это не отбило у вас желание писать.
 I — АННОТАЦИЯ • Потратьте час и напишите аннотацию на ваш сценарий длинною в одно предложение. Что-то вроде этого: « Злобный кот совершает путешествие в прошлое, чтобы поработить мир » Это — ваш сюжет крупным планом, аналог большого треугольника в схеме снежинки. Когда вы будете предлагать ваш комикс издателям, предложение-аннотация должно будет появиться в самом начале произведения. Его еще называют хуком (зацепкой), позволяющей продать комикс, сценарий, книгу издателю, дистрибьюторам, магазинам и читателям.
 Формирование Вашей снежинки
 Совет: • Чем короче, тем лучше. Предложение не должно превышать 15 слов. • * Никаких имен! Лучше сказать белка-акробат, чем Джейн Доу. • * Свяжите общую концепцию произведения с персонажами. Кто из героев больше всех пострадал по ходу развития сюжета? А теперь укажите, что он желает получить в виде награды. • * Читайте краткие аннотации книг в списке бестселлеров New York Times, чтобы понять, как это делается. Умение описать книгу в одном предложении — это искусство, и им стоит овладеть.
 II — АБЗАЦ Расширьте предложение до абзаца, описывающего завязку, конфликт и развязку романа. В результате у вас получится аналог второй ступени в схеме снежинки. Три конфликта плюс конец. Развитие каждого из конфликтов занимает четверть комикса, а на конец уходит еще одна четверть. В идеале абзац должен состоять из пяти предложений. Одно предложение на завязку, по одному — на каждый из конфликтов и — на конец.
 III — ГЕРОИ
 Герои — самая важная часть любого романа • — Имя героя. • — Предложение, которое описывает историю его жизни. • — Мотивации героя (чего он хочет добиться в идеале? ) • — Цель героя (чего он хочет добиться конкретно? ) • — Конфликт (что мешает ему добиться цели? ) • — Прозрение (что он узнает, как он меняется в результате случившихся событий? ) • — Абзац, который описывает события, в которых герой принимает участие.
 IV – История и описание героя Сделайте из каждого предложения аннотации самостоятельный абзац. Все из них, кроме последнего, должны заканчиваться конфликтом (последний — финалом произведения). В результате вы получите синопсис сценария. Потратьте время на одностраничное описание каждого главного героя. По полстранички уйдет на второстепенных персонажей. Эти синопсисы персонажей должны рассказать вашу историю с точки зрения каждого из них.
 V – И снова герои Превратите описание героев в развернутый рассказ о каждом из них с указанием всех существенных деталей: • дата рождения, • внешность, • история жизни, • мотивация, • цели и т. п. И самое важное — каким образом герой преобразится к концу романа? В результате ваши персонажи превратятся в реальных людей и подчас будут предъявлять свои претензии к развитию сюжета
 VI — ФИНАЛ • Первое — нужно взять четырехстраничный синопсис и составить перечень всех сцен, которые нужно будет прописать. • Перечислите героев, от имени которых ведется повествование, или глазами которых вы смотрите на происходящее в романе. • Пропишите, что происходит в каждой сцене. • При желании можно указать, на сколько страниц вы планируете растянуть данную сцену и количество страниц.
 Cадитесь и начинайте набивать черновик. Вы удивитесь, насколько быстро вы будете писать. Полученную рукопись уже можно использовать для создания арта и отрисовки первой раскадровки комикса.
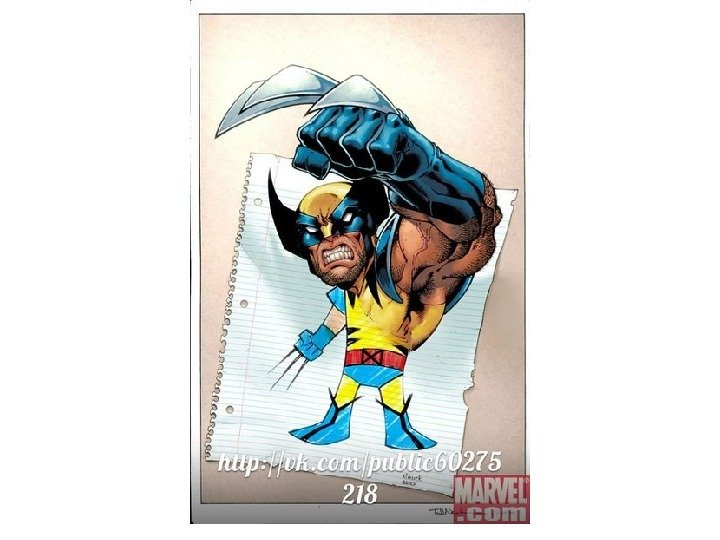
 Стили комиксов Техника рисования комикса может различна, и очень отличаться между собой. Смотрите ниже, , примеры страниц комикса Дарта Вейдер, Черепашки-ниндзя, манги Наруто.
 Разный подход в рисовании:
 Каждый художник имеет свой стиль рисования. Не забывайте, что комиксы — это коммерческий бизнес, особенно для больших компаний, таких как «Marvel» и «DC» , и вам придется выдавать тот продукт, который будет продаваться. А это означает — заниматься искусством, привлекательным для масс, причем делать все это вам придется с учетом неизбежного дедлайна. Если же вы не хотите жертвовать своей творческой индивидуальностью, занимаясь коммерческим искусством, в эти компании не стоит и соваться. В таком случае вам нужно идти в небольшие издательства, вроде «Caliber» или «Fantagraphics» ; оба эти издательства публикуют немало замечательных комиксов, чьи создатели отличаются индивидуальным художественным видением. А еще того лучше, издайте собственную работу сами.
 Рисовать одновременно и хорошо, и быстро
 Рисование карандашом Во многих комиксах, применяются карандашные рисунки. В основном это классика и некоммерческие проекты. Иногда мастера комиксов самостоятельно делают небольшие выпуски в карандашной технике.
 Подражание и клонирование Для начинающих художников совершенно естественно начинать рисовать, вдохновляясь искусством того, кем он (или она) восхищается. С годами каждый художник вырабатывает свой собственный стиль, полностью отличный от того, с которого они начинали. Во многих случаях начинающим художникам просто необходима стартовая точка, некий прочный якорь, от которого они и начнут свой рост. Хотя в бизнесе (комикс-бизнесе) к подобной практике широко принято относиться с неодобрением
 Срисовывание реальной жизни Возьмите карандаш и принимайтесь рисовать все, что вы видите вокруг себя. Рисуйте деревья, птиц, автобусы и автомобили, и старайтесь при этом подмечать все мелкие детали. Важнее всего, конечно, рисовать людей. Присматривайтесь к тем, кто вас окружает. Обращайте внимание на то, как они ходят, как они сидят и как они стоят, примечайте, как одежда сидит на их телах. Изображая людей, всегда предпочтительнее сначала сделать набросок тела, а потом уже облечь его в одежду. Начинающему художнику я бы не советовал рисовать человека сразу одетым, потому что понимание того, каково скрытое тканью обнаженное тело, позволит вам значительно достовернее изобразить складки на одежде.
 Обведение тушью В идеале, художник САМ должен обводить свои собственные карандашные наброски, поскольку только так он сможет говорить, что работа полностью его. В производстве комиксов, эти два процесса всегда разделены и выполняются двумя разными людьми. Но это лишь потому, что альбомы должны выходить вовремя, и такое разделение работы значительно ускоряет ее выполнение. Однако если время ЕСТЬ, свои работы художнику лучше обводить самому.
 Список инструментов • 1. Тонкие стальные перья. • 2. Механические ручки. • 3. Кисти. • 4. Тушь и бумага. • 5. Фломастеры и ручки для рисования. Иногда можно использовать фломастерами фирмы «Pentel» чтобы зачернить какие-то предметы или чтобы толсто прочертить грани кадров. • 6. Белая краска. • 7. Циркуль и резцы. Ими процарапывается рисунок поверх плотно покрывающего бумагу слоя туши. Такая техника создает эффект искр или дождя. Джэ Ли часто использует ее во многих своих работах. • 8. Угольники и лекала.
 Рисунок из «Камня» Avalon Studios
 Рисование с помощью компьютера Место действия – основа любого комикса
 Фотография как основа персонажа
 Доработка и оформление
 Векторная графика
 О векторной графике • Векторная графика, если кто не знает, для построения картинки использует не точки разного цвета, а кривые и фигуры, форма которых задана математическими формулами. Такая графика обычно требует меньше памяти для своего хранения (не требуется хранить значение цвета для каждой точки) и очень легко увеличивается или уменьшается до любого размера без изменения качества.
 Комикс «OFFцы»
 3 D-графика У 3 D-графики есть уже принципиальные преимущества. Построенную в редакторе сцену можно как угодно вращать в пространстве, делать крупные планы и отображать отдаленные объекты в перспективы без дополнительных усилий. По сути, по одной неподвижной сцене можно сделать сразу несколько кадров с разных точек, оставив у зрителя ощущение динамики происходящего.
 Scetch. Up
 Обработка мелких деталей в правильной пропорцией
 Готовый кадр
 Пиксельная графика — это когда каждый предмет, человек или элемент пейзажа на картинке вмещается в растровое изображение очень маленького размера. Например, человек может иметь высоту всего 40 пикселей. Если просто уменьшить фотографию объекта до такого малого размера, четкость и узнаваемость полученного изображения будет очень низкой. Поэтому, пиксельная графика создается вручную и каждая точка выверяется автором с большой точностью. В случае пиксельных комиксов для увеличения размеров персонажей и приемлемой читаемости невооруженным глазом, комикс увеличивается в 2 -4 раза, так что каждый пиксел заменяется на квадратик нужного цвета.
 «A Modest Destiny»
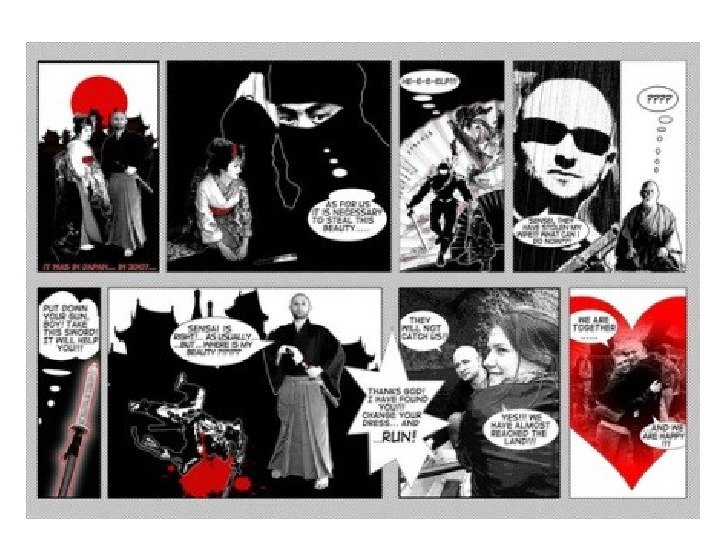
 Фотокомиксы Подход похож на предыдущий, но используются фотографии. Как и при использовании картинок из книг, можно просто просматривать фотографии из сети в поисках подходящих сцен, а затем построить серию кадров с подходящим текстом.
 Пример фотокомикса
 Скриншоты из игр
 Коллаж Этот метод сходен с предыдущими, но требует более сложной обработки. Вы не берете готовые фотографии, которые подходят вам по смыслу, а ищите только персонажей и вырезаете их из окружения. Затем вы подбираете подходящий фон (тоже фотографию, или картинку) и размещаете на нем героев и текст.
 Коллаж из газет и журналов
?
![]()
Log in
If this type of authorization does not work for you, convert your account using the link
-

-
May 20 2018, 12:29
- Литература
- Cancel
Мой первый сценарий. Комикс

Здравствуйте!
До этого мы с вами говорили о кино, потому что оно понятно всем, но сегодня я расскажу о менее привычном — о комиксе. Хотя сам я, напротив, в этом девятом искусстве чувствую себя более органично.
Для начала пара слов о том, что комиксы в России пока что воспринимаются как нечто несерьёзное, в лучшем случае, как исключительно детские истории, а в худшем — как суррогат литературы для тех, кому не хватает мозгов, чтобы читать книги. Так утверждают люди, которые просто ничего не понимают в комиксах. Они видели пару-тройку супергеройских историй не самого лучшего качества и делают на их основе выводы.
Интересно, какой бы вывод сделали эти люди обо всей анимации, если бы посмотрели только пару серий «Щекотки и Царапки»? А что бы они сказали обо всём кинематографе, если бы видели только треш-ужастик «Ночь живых мертвецов»?
Комикс — это отдельный, самостоятельный вид искусства, который позволяет рассказывать самые разные истории и делать это так, как не может ни одно другое искусство (кстати, во Франции его называют BD, а в Японии — манга, но суть от этого не меняется). Например, нигде, кроме комикса, нельзя передать эффект одновременности происходящих событий. В кино, можно сделать параллельный монтаж, но из-за того, что мы вынуждены смотреть движущееся изображение, эффект будет прочувствован не полностью, часть информации пройдет мимо восприятия. В комиксе же мы можем спокойно рассмотреть, происходящее в кадре и ощутить задумку автора в полной мере.
Посмотрим на сценарий комикса
В самой первой статье я уже показывал, как может выглядеть сценарий комикса. Сегодня сделаю это еще раз, потому что обещал показать свой вариант адаптации отрывка из пьесы Ярославы Пулинович «Победила я». Вот ссылка: https://yadi.sk/i/9PwYLwsI3W4CEm. Признаю, я при написании был в более выгодном положении, чем вы, потому что читал произведение целиком, а потому показал и других персонажей.
Сценарий комикса близок к киносценарию, но все же имеет существенные отличия:
-
Невозможны длинные монологи. Место на странице ограничено, много текста поместить не получится даже при большом желании. По этому приходится ограничивать речь персонажей одним-двумя предложениями или разбивать длинный монолог на несколько кадров. Иначе вы рискуете превратить комикс в прозу.

-
Все описания статичные. В отличие от кино, где все движется, в комиксе все замерло. Это значит, что описывая каждый кадр, мы должны представлять себе замершую картинку. Это правило нестрогое, потому что если написать, что герои идут, то художник просто нарисует людей в процессе ходьбы.
Пример:
Экскурсовод стоит у стенда, где изображен первый рубль Алексея Михайловича. Экскурсовод недовольна, чуть поджала губы. Марина и Дима стоят рядом, с азартом смотрят друг на друга.
-
Описание по кадрам. Описание в сценарии комикса происходит по кадрам, причем нужно постоянно держать в голове, что слишком много кадров не поместится на странице и что в кадр невозможно поместить слишком большое количество деталей. С другой стороны, некоторые художники-комксисты любят сами распределять действие по кадрам, так что сценарист может просто описать действие как ему удобно. Ходят слухи, что сценарист Марк Миллар (автор комикса «Секретная служба» по которму снят фильм «Кингсман») места, где герои должны сражаться, описывает так: «А тут эпичная битва!».
-
Распределение информации между изображением и диалогом. Комикс рассказывает историю сразу двумя средствами: изображением и репликами персонажей. Нужно распределять рассказ между ними и не допускать, чтобы описания не дублировали нарисованные действия героа. Как, например, тут.

-
Клиффхенгеры. Думаю, не стоит пояснять зачем нужны сюжетные крючки в произведении, но если в прозе мы добавляем их в конце главы, то в комиксе их приходится делать на каждом развороте и самый мощный крючок на последней странице. Клиффхенгер нужен, чтобы читателю было интересно перелистнуть страницу. Но нельзя забывать о том, что у журнала есть разворот, а значит, крючок нужно «вешать» только на правую страницу разворота (обычно она имеет нечётный номер). Дело в том, что читая, мы невольно заглядываем на соседнюю страницу и крючок на левой странице разворота будет тут же раскрыт, а значит, он там и не нужен.

На этом, пожалуй, на сегодня закончу и даже не будут давать задания. Если же кто-то захочет попробовать свои силы, то попробуйте взять любую сцену из своих произведений и превратить в сценарий комикса.
Владимир Максимушкин, сценарист
Комиксы
Как создать комикс? 5 шагов к рисованной истории
7 октября 2019
148 146 просмотров
Многие дети любят рисовать, а кто-то даже пробует создать собственный комикс. Поначалу кажется, что всего-то нужно сочинить историю, придумать героев, разделить страничку на блоки и действовать. Все так, но процесс гораздо интереснее и сложнее. В графическом романе «Правила выживания в школе» тема рисованных историй звучит дважды: сначала в сюжете, а потом — в рекомендациях автора в конце книги. Решили поделиться последними: вот секреты иллюстратора Светланы Шмаковой.
Шаг 1. Сценарий
Правила выживания в школе
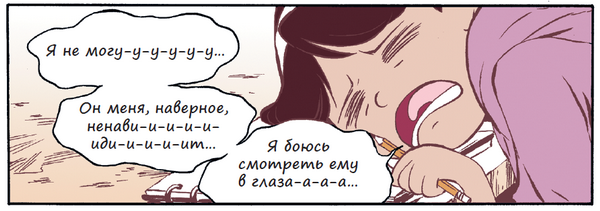
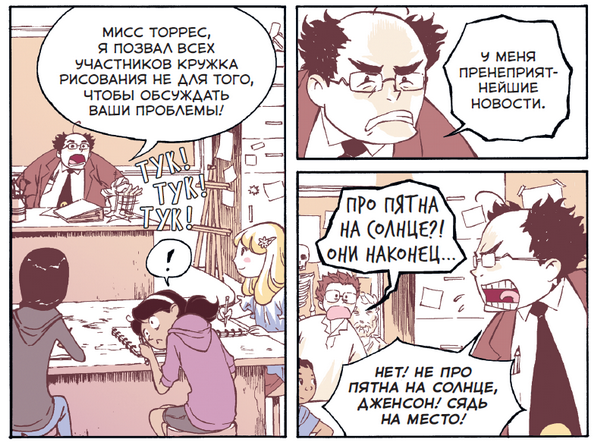
Прежде чем рисовать, нужно сделать заметки по визуальному ряду, сюжетам и диалогам. Подумайте, какие эмоции будут испытывать герои, как выглядеть, каким тоном говорить, какие стилистические особенности речи будут у каждого из них.
Вот пример и готовые иллюстрации из комикса:
Пеппи, драматично: «Я не могу-у-у-у-у-у-у-у… Он меня, наверное, ненави-и-и-и-и-идит… Я боюсь смотреть ему в глаза-а-а-а…»
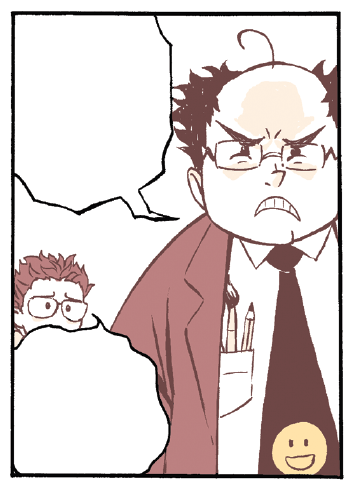
Мистер Рамирез опирается на свой стол, говорит раздраженно: «Мисс Торрес, я позвал всех участников кружка рисования не для того, чтобы обсуждать ваши проблемы!»
Дженсон, в ужасе: «Про пятна на Солнце?! Они наконец…»
Мистер Рамирез, раздраженно: «Нет, не про пятна на Солнце, Дженсон! Сядь на место!»
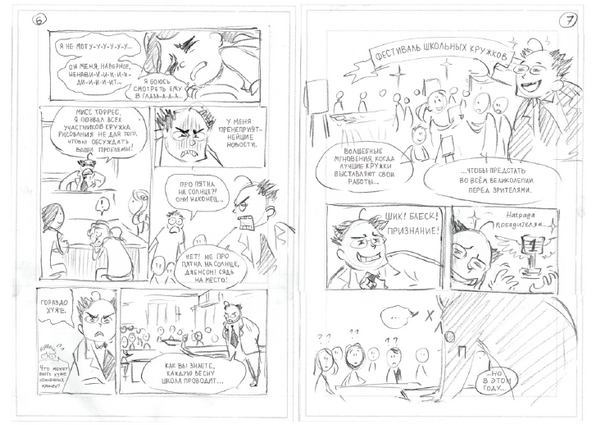
Шаг 2. Раскадровка
Как говорит Светлана, она делает ее очень приблизительной, иногда это просто наброски людей с ручками-палочками. На этом этапе иллюстратор разрабатывает позы персонажей, расположение панелей, речевые пузыри и сам сценарий. Обычно рисует на листах для принтера формата А4 — их легко найти.
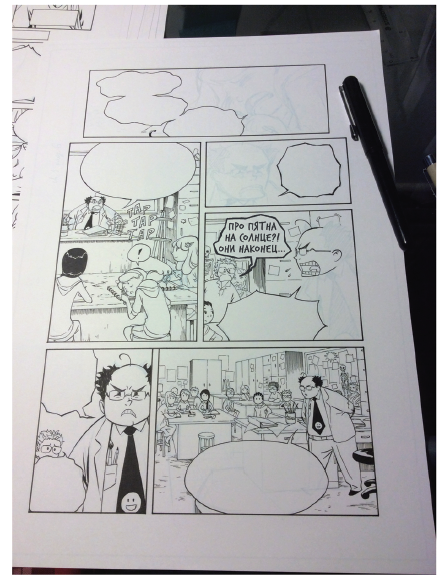
Шаг 3. Карандаш
Сначала рисуйте карандашом. Рисовать можно на обычной бумаге. Старайтесь не привязываться к своим инструментам, на случай, если они потеряются. Бумагу и карандаш легко найти в любом канцелярском магазине, дома или в школе.

Шаг 4. Обводка
Многие художники предпочитают обводить тушью нарисованные карандашом черновики. Светлана поступает иначе — сканирует рисунки и применяет non photo blue фильтр. Затем распечатывает и обводит тушью (так у иллюстратора сохраняются страницы и в карандаше, и в туши). Обводка после non photo blue хороша тем, что при сканировании в Bitmap/BSW-режиме голубой не проявляется. Поэтому подтирать карандашные линии не придется.
Когда обведенные страницы отсканированы, можно раскрасить их в графическом редакторе. Попробуйте использовать планшет для рисования и графическую программу.
Еще 2 хитрости
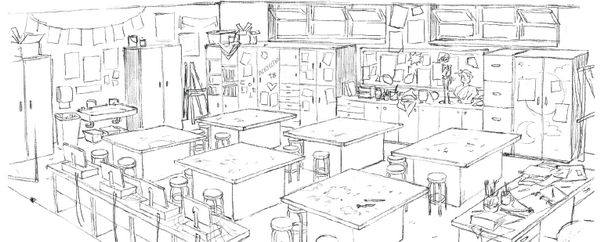
1. Когда рисуете обстановку, подумайте, как она соотносится с героями. Так, в комиксе «Правила выживания в школе» кабинеты кружка рисования и научного кружка соответствуют характеру преподавателей.
Вот кабинет мистера Рамиреза — симпатичного, рассеянного, непостоянного, творческого человека.
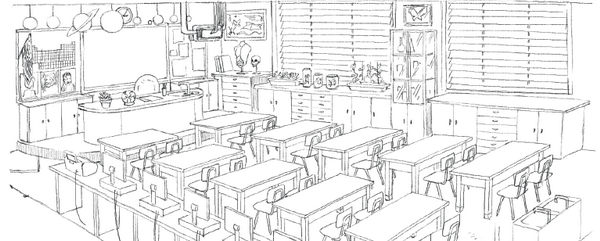
А это — кабинет естественных наук. Здесь порядок и чистота, что соответствует характеру мисс Тобинс — самого рационального и организованного человека, которого вы только встречали.
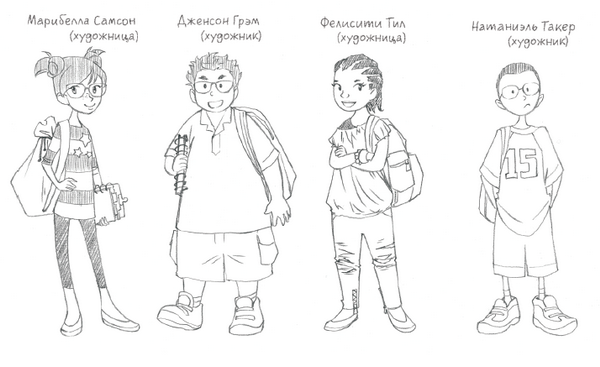
2. Продумывайте второстепенных героев: их истории, заморочки, мечты. В этом комиксе мы часто видим ребят из двух кружков и сотрудников школьной газеты. Так, Марибелла Самсон — талантливая и уверенная в себе ученица, которая готова бороться за право участвовать в фестивале школьных кружков. А Дженсон Грэм — смешной парень со странностями, которого беспокоят пятна на солнце и история о роботах школьной столовой, которые вышли из подчинения.
Короткие советы тем, кто учится рисовать
Комикс, который научит тебя рисовать
Если юный художник еще не успел отработать навыки рисования, стоит потратить на это время. Например, можно поучиться вместе с Дэвидом — героем книги «Комикс, который научит тебя рисовать» (от художника Марка Крилли). Вот несколько коротких советов:
- Обращайте внимание на форму предмета, который рисуете.
- Соблюдайте пропорции.
- Измеряйте на глаз. Например, когда рисуете ремешок часов, подумайте: сколько бы циферблатов поместилось с одной и с другой стороны?
- Замечайте ошибки.
- Не давите сильно на карандаш (потом замучаетесь стирать:-))
- Обращайте внимание на негативное пространство — пространство между или вокруг объекта/объектов рисунка.
- Показывайте объем с помощью штриховки (когда нужно добавить тень, беритесь за кончик карандаша и наклоняйте его под острым углом к бумаге, ускорьтесь, чтобы штрихи выглядели увереннее).
- Не рисуйте контур сразу, а делайте набросок — не нужно углубляться в детали, изобразите основные формы. Начинать с деталей рискованно: можно изобразить их точно, а пропорции исказить, или техника изменится в процессе рисунка и верхняя часть будет отличаться от нижней. Смысл в том, чтобы одновременно работать над всеми элементами рисунка.
- Чтобы нарисовать тени, найдите источник света. Тени будут там, куда он не достает. Обращайте внимание на насыщенность теней.
Вот еще один совет: первый комикс вполне можно нарисовать без компьютерных программ и сканирования. Обводите контуры гелевой ручкой, раскрашивайте иллюстрации прямо на бумаге, воспользуйтесь цветными карандашами или фломастерами. А когда почувствуете, что дело пошло, используйте профессиональные средства.
По материалам книг «Правила выживания в школе», «Комикс, который научит тебя рисовать»
Обложка поста — иллюстрация из книги «Правила выживания в школе»